“The virtues of donations are great, because it helps the needy and at the same time it gives an opportunity to the donor to give the surplus to the people in need ” - Sama Veda

Search This Blog

Showing posts with label Easy tiffins. Show all posts

Thursday, June 18, 2026

MAPILLAI SAMBA THENGAI DOSAI RECIPE / MAPPILLAI SAMBA NEER DOSA RECIPE

How-to-make-mappillai-samba-neer-dosa/Mappilla-samba-thengai-dosai-recipe/Mappillai-samba-neer-dosa-recipe


I am happy to be the first, in posting a Thengai dosai/Neer dosa with Mappilai Samba Rice. Mapillai Samba or Bridegroom Rice is a native variety of rice, which is red in colour and is grown in Tamilnadu. It is very helpful in prostate problems which comes for gents after an age. It reduces the LDL cholesterol and increases HDL cholestrol in the body. Since it has a low glycemic index it is good for diabetes too. It improves immunity and stamina, strengthens muscles and nerves. It has a good source of zinc and the antioxidants present in the red colour also increases haemoglobin. All dishes like Idli, Dosa, uthappam, paniyaram, aappam, upma, pongal can be made with this rice. This rice can be soaked and processed to flour to make puttu, kozhukattais and sevai.   

Coming to the recipe, 

INGREDIENTS:

Mappillai samba rice - 1 cup
Raw Rice - 1 cup (Dosa rice can also be used)
Grated coconut - 1 cup
Salt to taste
Oil - to drizzle

METHOD:

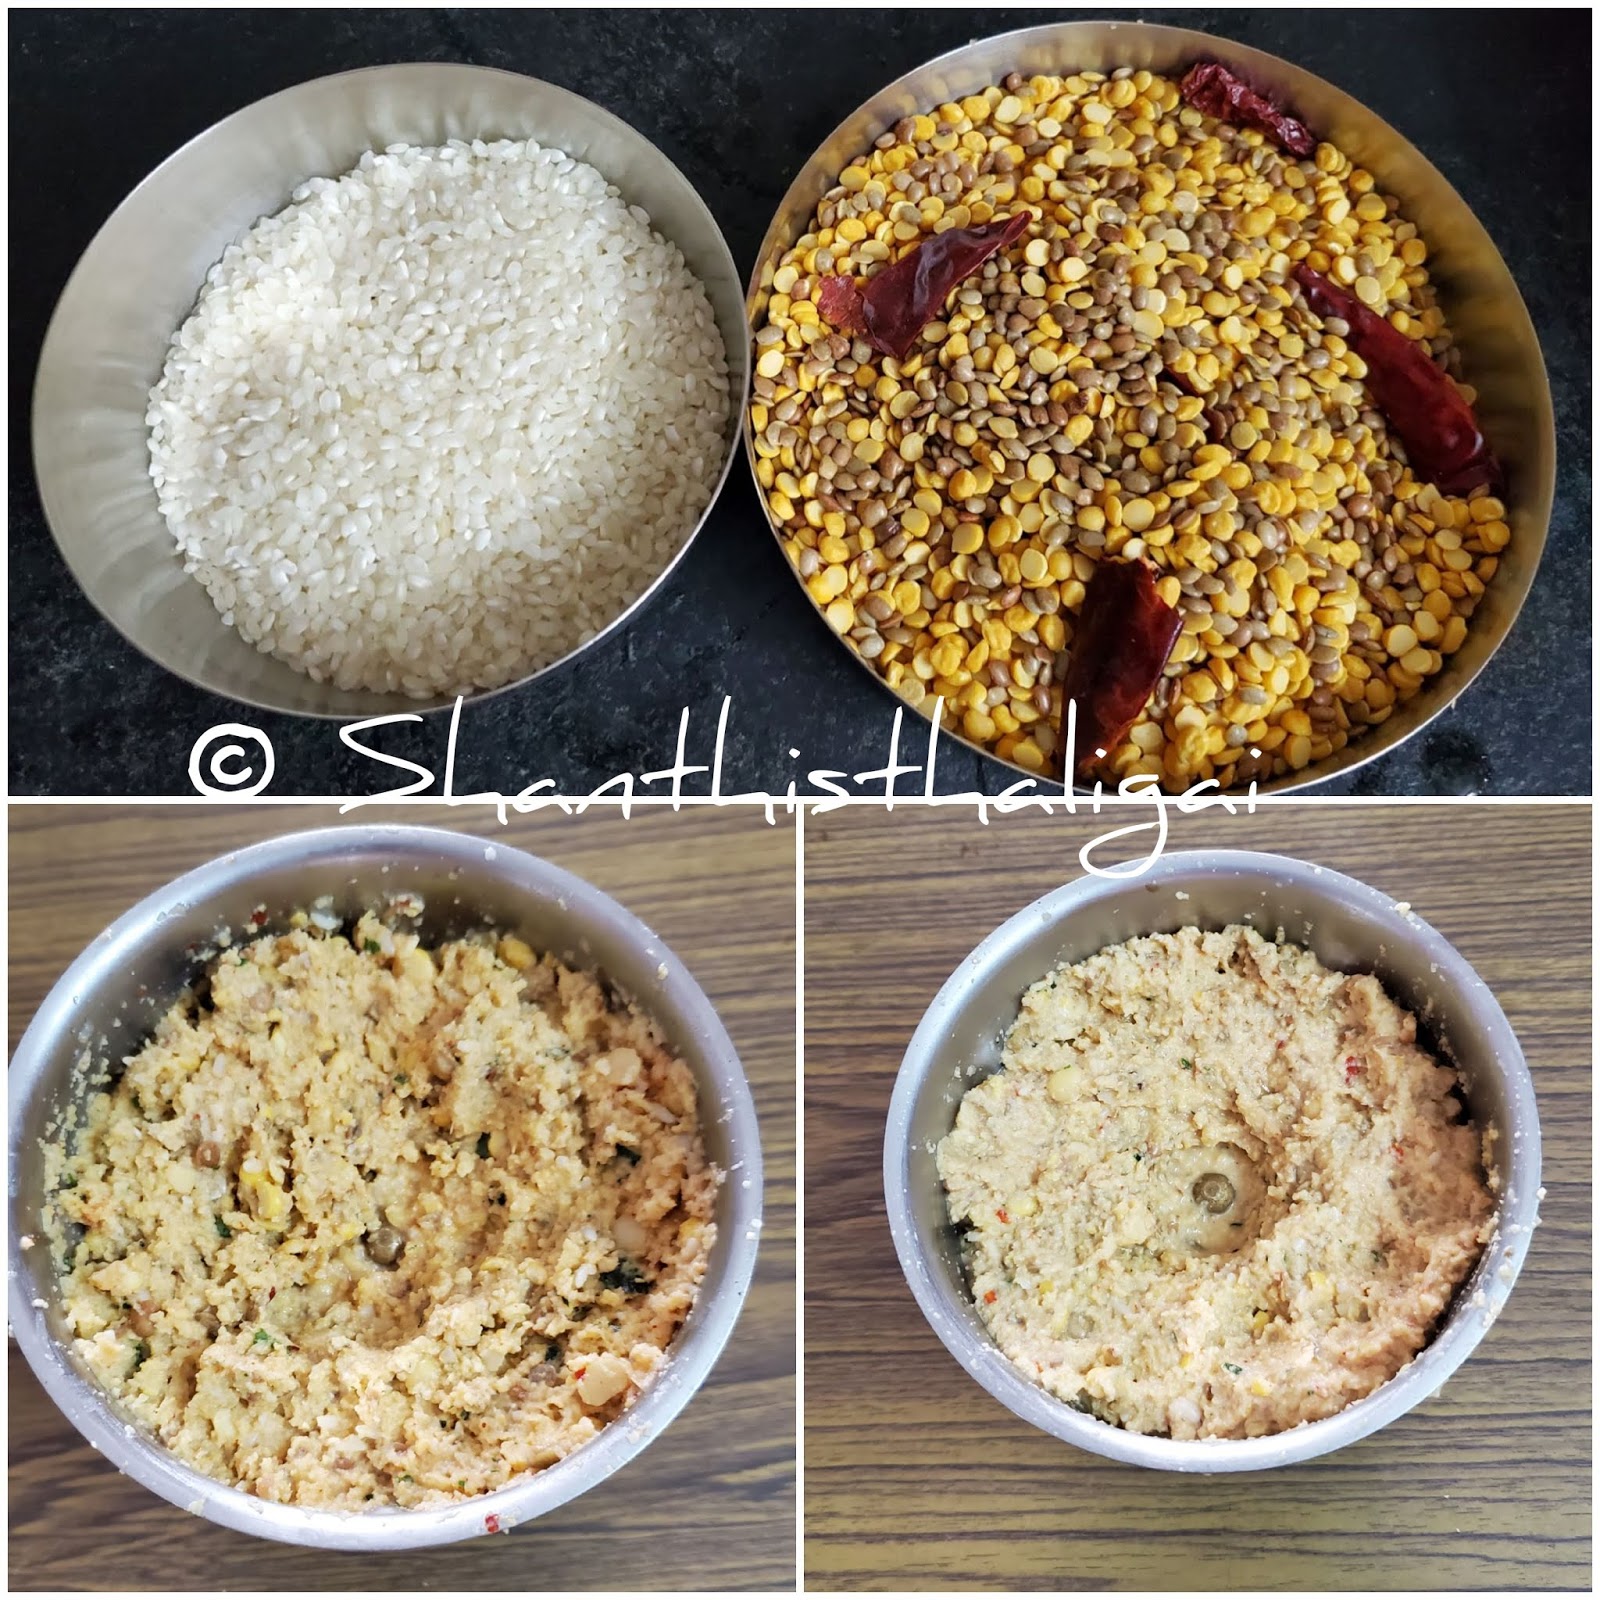
Soak Mappillai samba rice and raw rice together for not less than 6 hours. You can also soak it overnight. Grind it with grated coconut and salt to a coarse (chiroti rava like) batter. Do not grind fine.(Do not allow the batter to ferment).

Add water and make a medium-thin batter (the batter should not be very watery or very thick).

Heat a dosa pan, add a drop of oil, wipe with a kitchen tissue, pour the batter from the sides (as of rava-dosa). 

Drizzle very little oil to the sides. When done, flip it to the other side. Mix the batter well every time you pour dosa. Serve hot.

Goes well with dosai molaga podi.

Sunday, April 12, 2026

Instant Pot Idli Recipe - Beginner's Guide - How do you steam idli in an Instant Pot?


Instant Pot Idli - A beginner's guide

How do you steam idli in an Instant Pot?

Mine is INSTANT POT DUO 6 QT. Regular 6 plate idli stand, with 4 idlies in a plate, fits perfectly in this model. For a 3 qt. instant pot, idli plates which fits into that are available online or in stores.

Grease idli plates, fill with idli batter.

Add 1 cup of water in instant pot.

Place batter filled idli stand/plates in the instant pot.

Close the lid. Turn the knob to VENT position

Press STEAM MODE > LOW PRESSURE (use pressure button).

Countdown timer doesn't work in VENT position. Set a manual timer for 10 mins.

After 10 mins press CANCEL > NPR
(NPR-natural pressure release).

Soft, fluffy, perfect idlies are ready.

NOTE:
You can also allow water in the instant pot to boil first and then place the batter filled idli plates. If so, opt for 7 minutes manual timer.

Thursday, April 2, 2026

INSTANT POT WHEAT RAVA UPMA RECIPE


Instant-pot-upma-recipe

INSTANT POT WHEAT RAVA UPMA VIDEO ðŸ‘‡ðŸ‘‡

No LPG? No worries. 

LPG cylinders remain the primary cooking fuel in most Indian homes. 

Using an Instant Pot is an effective solution to manage cooking daily meals without relying on gas. 

While at my son's home in US, I had been using Instant Pot extensively for cooking, and also for fermenting batter, sprouting, yoghurt making etc. Now, it's time to use it in India. 

Instant pot is a "set-and-forget" pressure cooker which cooks Rice, dal, stir fry, porridge, curries, and stews etc. which is very useful in desi cooking as well.

This Instant pot wheat rava upma was done in a 6qt Instant Pot DUO model. 

INGREDIENTS:

Roasted wheat rava - 1 cup
Water - 2+1/4 cups
Mixed vegetables
(Tomato,carrot, peas, beans, cauliflower)
Green or red chillies - 2
Curry leaves - few
Turmeric powder- 1/4 tsp.
Salt - to taste
Hing - 1/4 tsp.
Ghee - optional

To Temper:
Oil - 2 tablespoons
Mustard seeds - 1/4 tsp.
Gram dhal- 1/4 tsp.
Urad dhal - 1/2 tsp.

Coriander leaves - to garnish

METHOD:

Chop vegetables and tomatoes. 

Switch on instant pot, select SAUTE MODE > ON > HOT
Pour oil, temper with given ingredients, add vegetables, green chillies, curry leaves, sauté for a minute, add roasated rava, mix well, add 2+1/4 cups water, stir. If you want a mushy upma add some more water.

CLOSE LID > SEALING POSITION 
Change settings:
SEALED POSITION > CANCEL SAUTE
PRESSURE COOK > LOW PRESSURE > 5 MINUTES > NPR (No Pressure release)

When done, fluff with a fork, drizzle a spoon of ghee, garnish with coriander leaves and serve hot with chutney or sambar. 

STOVE TOP METHOD LINK: https://www.shanthisthaligai.com/2009/11/vegetable-wheat-rawa-upma.html?m=0

NOTE: Do not panic if you get a BURN message, just stop the cooking cycle. Turn the knob to VENT position. Scrape off if anything is stuck to the bottom. Sprinkle some water if necessary. Cook on SAUTE for few minutes, covered with a glass or stainless steel lid and it will be done. 

Friday, January 21, 2022

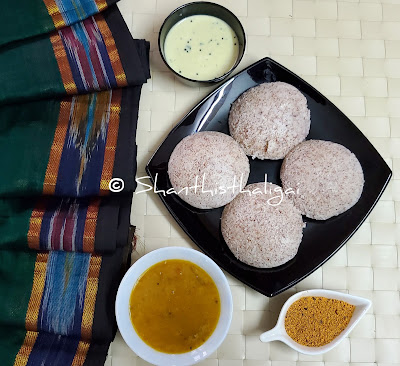
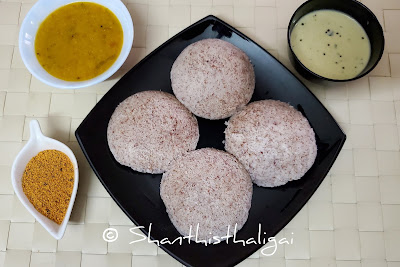
MAPPILLAI SAMBA IDLI RECIPE/ NATIVE RICE IDLI RECIPE

traditional-rice recipe, indigenous-rice-recipe
 
mappilai-samba-idli-recipe, mappillai-samba-idli-recipe

Mapillai Samba or Bridegroom Rice is a native variety of rice, which is red in colour and is grown in Tamilnadu. It reduces the LDL cholesterol and increases HDL cholestrol in the body. Since it has a low glycemic index it is good for diabetes. It improves immunity and stamina, strengthens muscles and nerves. It has a good source of zinc and the anti-oxidants present in the red colour also increases haemoglobin. All dishes like Idli, Dosa, uthappam, paniyaram, aappam, upma, pongal can be made with this rice. This rice can be soaked and processed to flour to make puttu, kozhukattais and sevai. Coming to the recipe, 

INGREDIENTS:
  • Mappillai samba rice/Any traditional rice - 4 cups OR 3 cups mappillai samba and 1 cup idli rice
  • Whole white urad dhal - 1 cup
  • Methi seeds - 1 teaspoon 
  • Red rice aval (red rice poha) - 1/2 cup (optional)
  • Salt - to taste
METHOD:
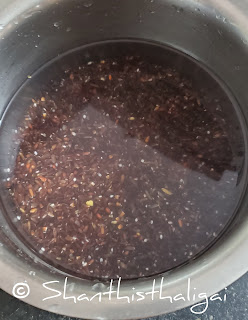
  • Wash mappillai samba rice 3 to 4 times until the water is clear like in picture and then soak both rice with enough water for 6 hours. As the soaked water has nutrients, you can grind the batter with this water. A combination of mappilai samba, idli rice and red rice aval as given in ingredients gives soft idlis.
  • Wash well and soak urad dal along with methi seeds separately. Its enough if you soak urad dhal for 3-4 hours.
  • Drain and reserve the soaked water from dhal. Put urad dhal in grinder, add half a cup of water and grind until fluffy. Grind by adding the soaked water little by little. Do not add all the water at once. Grind until you can see air bubbles when you take the batter in hand, that is the consistency for urad dhal batter for idli. Transfer the batter to a vessel, keep aside. 
  • Now grind the soaked and drained rice separately. Add rice soaked water little by little and grind to a slightly grainy batter.  Need not grind smooth. If using red rice aval (red rice poha), just wash it well and add while grinding rice. Transfer this to the dhal batter vessel. Add salt and mix both the batter using hands (this helps in fermentation). Allow it to ferment for 8-9 hours. The consistency of the batter should be like idli batter. These type of indigenous rice ferments soon.
  • Make idlis using idli plates. Grease the idli plates , pour in a ladle of the batter and steam for 10- 12 minutes.                        
  • Unmould and transfer the idlis to a bowl, serve hot with sambar or milagai podi or any chutney of your choice. 
NOTES AND TIPS:
(For spongy idlis) :

1. Wash the rice until the water is clear and then soak. 
2. Grind urad dal with the soaked water itself until fluffy.
3. Use water little by little while grinding.
4. The batter should not be watery.
5. These indigenous rice ferments soon. So, keep a watch on it. 
6. Keep the batter for not more than 3 days as it tastes sour when kept for long.
7. Grind with soaked water as it contains nutrients. 
8. While making idli, dosas, its better to add idli rice with any native rice.

Saturday, August 29, 2020

BROKEN WHEAT PONGAL RECIPE / DALIA PONGAL RECIPE / LAPSI PONGAL RECIPE

lapsi pongal recipe, Dalia pongal,
Broken wheat pongal is a healthy and easy South Indian breakfast dish prepared with samba variety  wheat.  It is known as Dalia in Hindi. I make this during vrat days. This dish is bachelor friendly and a healthy substitute for rice as well.
NOTE:  Vegans can avoid ghee and use any plant based oil.

INGREDIENTS:
  • Broken wheat - 1/2 cup 
  • Moong dal - 1/2 cup 
  • Black pepper - 1/8 tsp. 
  • Cumin seeds - 1/8 tsp. 
  • Grated ginger - 1 tsp 
  • Asafoetida 
  • Water - 2 cups
  • Salt - to taste 
  • Curry leaves 
To temper:
  • Oil - 1 tablespoon 
  • Ghee - 1 tablespoon 
  • Pepper-jeera powder - 2 tsp
 

METHOD:
  • Heat a pan and dry roast broken wheat until it becomes white.
  • Dry roast moong dal until hot.
  • Wash both dal and broken wheat, drain and keep aside.
  • Take a vessel, add water and all ingredients, mix well and pressure cook for 4-5 whistles.
  • When the pressure is released, take out the vessel, add pepper-jeera powder to the pongal. Heat oil and ghee and pour on top of it. Mix well. Serve hot with any chutney of your choice.

Wednesday, May 27, 2020

HORSEGRAM ADAI RECIPE / KOLLU ADAI RECIPE

Horsegram adai recipe, Kollu adai recipe
Horsegram is considered a super food. It has the highest calcium content among pulses and has high source of protein. It is ideal for obesity people and diabetic friendly.

INGREDIENTS:
  • Horse gram (Kollu) - 1/2 cup
  • Idli rice - 1/4 cup
  • Bengal Gram (Kadalai paruppu) - 1/2 cup
  • Tur Dal - 1/4 cup    
  • Ginger - 1" piece
  • Hing - 1/8 tsp.   
  • Red Chillies - 4 or 5  
  • Curry leaves - 2 sprigs
  • Salt - to taste
  • Oil - to drizzle

METHOD:
  • Soak dhals, chillies and rice together in water for 4 hours. Drain the water. Reserve very little of soaked water to grind. Grind in a blender to a coarse, thick paste with ginger, curry leaves and salt. Add very little soaked water if necessary.
  • Heat a tawa. Keep the batter thick and spread adai with hands on tawa directly or make it thin and spread the batter with a ladle. Drizzle oil on sides. Cover and cook for a couple of minutes. When done flip to the other side. No need to cover now. Cook until crisp golden on both sides. Serve hot with butter, jaggery , dosai milagai podi or avial. 

Saturday, May 16, 2020

STUFFED TUMBLER IDLI

Stuffed tumbler idli recipe


INGREDIENTS:
  • Idli batter - as needed
For the filling:
  • Oil- 2 tsp.
  • Ajwain - 1/2 tsp
  • Chilli powder - 1/2 tsp.
  • Turmeric powder - 1/4 tsp
  • Curry leaves - finely chopped
  • Coriander leaves - finely chopped
  • Green chillies - finely chopped
  • Boiled potato - 2 medium
  • Salt - to taste
To coat:
  • Dosai milagai podi  and gingelly oil
METHOD:
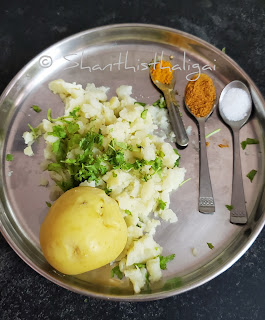
  • Boil, peel and grate potatoes. Add turmeric powder, chilli powder, coriander leaves, mix  well and keep aside for 5 minutes.
Stuffed tumbler idli recipe
  • Heat oil in a pan. Add curry leaves, green chillies and the potato mixture. Add salt to taste, mix well and saute for 2 minutes. When cool, roll into cylindrical shape just to fit in the size of the tumblers.
  • Grease gingelly oil inside the stainless steel tumblers,  pour a ladle of idli batter. Place the potato rolls in the centre and cover again with batter (little less than the rim, this enables the idli to just rise upto the rim).
  • Steam the potato stuffed idlis for 8 minutes or until done.
  • When slightly cool, run a knife through the sides and unmould the idlis gently.
  • Roll these idlis with dosai milagai podi and oil mixture to coat well. Cut into circles and serve with accompaniments of your choice.
  • These idlis doesn't need any accompaniments and tasty by itself. An interesting lunch box recipe for kids is ready.
Adapted from sailajakitchen.org

Saturday, April 18, 2020

MASOOR DAL DOSA RECIPE


INGREDIENTS:
  • Dosa rice or Idli rice - 3 1/2 cups
  • Masoor dhal or Tur dhal - 3/4 cup
  • Whole white urad dhal - 1 cup
  • Thick poha(Aval) - 1/4 cup
  • Dry red chilli - 2
  • Methi seeds (Fenugreek seeds) - 1/2 tsp.
  • Jeera - 1 tsp.
  • Salt - to taste
  • Oil - to drizzle

METHOD:
  • Soak all the above ingredients together for 4 hrs. 
  • Grind it with salt to a smooth batter. Ferment for 6 hours. 
  • Heat a dosa tawa, pour the batter and spread it thin to form a circle. Drizzle oil around the dosa, cook until golden brown and crisp.
  • Serve with dosai milagai podi, kara chutney or any chutney of your choice. 

Friday, April 17, 2020

FOXTAIL MILLET TOMATO NEER DOSA

foxtail millet tomato neer dosa, tomato neer dosa, Millet mania

INGREDIENTS:
  • Foxtail millet (Thinai) or Any millet - 2 cups
  • Grated Coconut - 1/2 cup 
  • Tomato - 2 medium sized
  • Salt - to taste
  • Oil

METHOD:
foxtail millet tomato neer dosa, tomato neer dosa, Millet mania

  • Soak foxtail millet (Thinai) (OR any millet) for 3 hours and grind it along with scraped coconut, tomato and salt to a fine paste. (Do not allow the batter to ferment).
  • Add water to make a medium-thin batter (the batter should not be very watery or very thick).
  • Heat a dosa tawa, pour the batter from the sides (as of rava-dosa).
  • Drizzle very little oil to the sides. When done, turn it to the other side. Serve hot.
  • Goes well with dosai molaga podi,or any chutney of your choice.

Wednesday, August 1, 2018

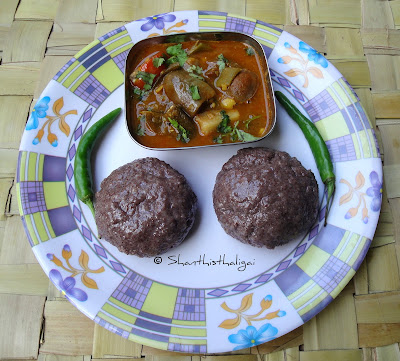
Ragi mudde (finger millet)

ragi,mudde,ragi kali,finger millet

Ragi mudde is a nutritious healthy ball made with ragi flour and water. It is a wholesome meal and staple food in Karnataka. It is also called as 'Ragi sangati' in Andhra and 'Ragi kaLi' in Tamilnadu. 'Ragi koozh' also known as 'Aadi koozh' is popular in TamilNadu. In the Tamil month of Aadi, 'ragi koozh' is offered and distributed as 'Prasadam' in Mariamman temples. There are several health benefits of Ragi. Ragi has high fibre content and rich in calcium. It helps in increasing HDL cholesterol and lowers triglycerides. But people who have thyroid disorder, refrain from having ragi frequently.

Traditional way:

Mix a tablespoon of ragi flour in water to make a thin paste. Add water & salt into a heavy bottomed pan and when this boils add the thin paste, mix well add remaining ragi flour evenly on top of it, close the pan and cook in medium flame for 6 to 7 minutes without disturbing the flour. Then with a mudde kOlu, stir well until all the flour becomes a single mass. Switch off the flame. Cover and keep for a few minutes and when still hot, add ghee and take a portion of dough and shape into balls.

Now, to the easy way.

This recipe is the easiest way of making Ragi mudde without a mess, useful for beginners.

INGREDIENTS:

Ragi flour - 1 cup.
Water - 1 3/4 to 2 cups.
Salt - to taste ( I used 1/3tsp.)
Ghee - 2 tablespoons

METHOD:

Combine ragi flour with water and mix well without any lumps to a batter consistency. Keep aside.

Grease a plate with little ghee. Keep ready.

In a thick bottomed kadai /non-stick kadai, boil 1 1/2 cup of water alongwith salt and a teaspoon of ghee. When water starts boiling, add the the ragi batter, mix well with a wooden ladle. (Traditionally, a stick called 'Mudde kOlu' is used to stir the mix). Stir continuously until thick. Add ghee and stir and until it forms a lump and leaves the sides. Cook further until the dough becomes shiny. Cook covered in low flame for a minute and switch off the flame.

When hand-bearable hot, transfer the ragi dough to the greased plate. Smear ghee on your hands and shape to balls/mudde (tennis ball size). If the dough is hot, dip your hand in water for each ball. Alternatively, you can grease a small bowl with ghee put the required quantity of ragi dough in the bowl and rotate it which forms round balls. Serve hot with sambar. Goes well with saaru and buttermilk too.

A note on how to eat?

And a small tip in eating these muddes; Mudde will be sticky and remain on your tooth if chewed. Ragi mudde is dipped in saaru/ sambar and swallowed. i.e, A small portion of ragi mudde is 'pinched', dipped in the sambar and simply swallowed. 😋

And what if chewed? Taking it out of your teeth will be a horrible experience. Chew and find it 😉 OR pop it into your mouth, swallow, repeat. 😃

Note:
Thin ragi batter gives smooth and soft Ragi Mudde.
Use a thick wooden ladle or back of the wooden ladle for easy mixing.

Monday, November 13, 2017

MOR KALI RECIPE/ MOR KOOZH RECIPE

How to make Mor kali, How to make Moar koozh,How to make Mor koozh
Mor kali / Mor koozh is a traditional recipe of Tamil Nadu. It is often made in Tamil Brahmin families. It is made with rice flour and buttermilk. This recipe can be made in a jiffy, easily digestible and can be made for breakfast, evening tiffin or dinner.

INGREDIENTS:

Rice flour OR Processed rice flour OR Store bought rice flour - 1 cup
Whisked sour curd - 3/4 cup
Salt - to taste (approx. 1 tsp. or as needed)
Water - 1 or 2 cups

To temper:
Gingelly oil - 1 tablespoon
Mustard seeds - 1/2 tsp.
Urad dhal - 1 tsp. (optional)
Green chilli (chopped) -1 OR Dry red chilli- 1 (cut )
Hing - 1/4 tsp.
Mor milagai (curd chillies) - 4 (slightly crushed)

Curry leaves - 2 sprigs (finely chopped)
How to make Mor kali, How to make Moar koozh,How to make Mor koozh
METHOD:

Whisk curd until smooth. In a mixing bowl, add rice flour, whisked curd, salt and water. Mix without any lumps. Mix to a little thinner than dosa batter consistency. Heat oil in a kadai. Temper with given ingredients. When mor milagai turns black, simmer the stove and add the rice flour mixture. Stir continuously until it thickens. 
(Alternatively you can add the temperings to the rice flour mixture, mix well and stir in a kadai). The consistency of the mixture should be like halwa and glossy.  Add a spoon of gingelly oil, mix well. 

Transfer it to a plate and even the surface with the backside of a greased cup. When slightly cool, cut into desired shape. You can also have it like koozh.
How to make Mor kali, How to make Moar koozh,How to make Mor koozh
Note: Coconut oil can also be used.

Thursday, August 24, 2017

BROCCOLI PARATHA RECIPE / PREETHI ZODIAC REVIEW

Recently I received a request from Preethi Kitchen appliances to review their product Preethi Zodiac Food Processor. I received the product from them and after using it for quite sometime, I am sharing my experiences and personally feel that Preethi Zodiac Food Processor is a good companion in kitchen. 

Preethi Kitchen appliances,the iconic brand, have recently launched their food processor appliance named PREETHI ZODIAC MIXER GRINDER.

Mixie/grinder has become inevitable in any Indian household. So, what’s the difference between mixie/blender and a food processor? Mixies/blenders are used for making purees, smoothies, grinding etc., whereas food processors excel at grating, shredding, chopping, kneading, mincing, pureeing, grinding, herbs chopping and so on.

The Master Chef Jar is very attractive. The atta kneader attachment kneads even stiff dough within a minute as the product has a heavy duty motor. As it is kneading in high speed, the rotis also turn out to be soft. The dough is just like traditionally kneaded dough. With the right attachment, it chops, shreds, grates and slices paneer, cheese, vegetables and fruits quickly and easily. I was surprised to see everything done in just few seconds, you can say it as a record time. The wide mouth design of the master chef jar enables to hold more quantity and makes cleaning process also very easy. An added feature is the citrus juicer. It fits in the master chef jar.

Note: Blend in batches if you have to do in large quantities.

High speed juice extractor: This extracts juice from fruits and vegetables with ease. You can make preservative free juice at home. Now, with this facility, you can say a big NO to storebought juices, which have preservatives. Coconut milk extract is done in minutes. Centrifugal Juicer ensures instant juicing with more juice extraction

Wet/dry/chutney jars: It grinds really fast and smooth. I ground half kg. soaked millets and rice in less than 2 minutes, similarly the powders.

Build: Very sturdy. So no jerk / vibration. 


I can say it as a multitasker and a stylish addition to home. It is easy to use, assemble and clean. I would recommend Preethi Zodiac as an essential home appliance and a must in any kitchen which makes kitchen work simpler.

Features:
750W Motor - Superior performance, 5 year motor warranty; 2 year product guarantee.
3 in 1 Insta-Fresh Juicer - centrifugal juicing, blending and extraction
2.1 Ltr. Master Chef Jar - atta kneading, citrus juicer, grating, slicing, chopping
1 wet grinding jar, 1 dry grinding jar, 1 chutney jar
Lifelong Free Service.

Occupies more storage space but worth it. There could have been one coconut scraper attachment and vegetable dicer attachment too. For more details visit http://www.preethi.in/


Disclaimer: This review is done on request from Preethi Kitchen appliances. This review is my personal experience. Use your own discretion before buying the product. 


HOW I MADE BROCCOLI PARATHA IN LESS THAN 10 minutes with Preethi Zodiac Food Processor?  

I grated paneer in 10 seconds, broccoli in 15 seconds, sliced carrots in 5 seconds, shredded red cabbage in 5 seconds. I smeared oil on the inner surface of the mixer and blades. Added the flour and salt. Switched to 1st speed, added water little by little until the flour came together. Did not add water after that.  Pulsed 4 to 5 times to finish the kneading and switched off. This was done in a minute. You get a non-sticky dough and soft rotis like the traditionally made ones. All this work was done by Preethi Zodiac Food Processor in less than 3 minutes.


NOW TO THE RECIPE:

INGREDIENTS:
Whole wheat atta - 2 cups
Salt - to taste 
Ghee - for spreading 
Butter - for topping

FOR STUFFING:
Paneer - 100 gms
Broccoli - 1/2 kg.
Potato - 2 (medium sized)
Chilli powder- 1/4 tsp.
Garam masala - 1 tsp.
Green chillies - 2
Coriander leaves - few
Omam(Ajwain) - 1/2 tsp.
Salt - to taste 

METHOD:
(I have pressed the dough to show how soft and non-sticky it is)

Knead atta with salt and little water to a medium soft dough. Keep aside. 

Wash paneer well, grate it, and squeeze out the water completely using your hand. Wash broccoli and grate it. Boil potatoes, peel the skin and mash it well without any lumps. Grind coriander leaves and green chillies coarsely without adding water. Mix all ingredients alongwith ajwain(omam), chilli powder, garam masala and salt. Your stuffing is ready now.

Take medium -sized balls from the dough, shape it to a cup and fill it with stuffing and close it from the sides. OR you can also roll the dough to small puris, fill the stuffing in the centre and close it from the sides.

Dust the balls with wheat flour, and roll it out gently.

Heat a tawa, place the rolled paratha, allow to cook on one side, and when the colour changes, flip it to the other side. Spread some ghee on each side, flip and cook till done.

Serve hot with curd topped with chaat masala, roasted jeera powder and chilli powder OR tomato sauce OR tomato ketchup OR pickle OR any side dish of your choice.

Thursday, August 10, 2017

MUDAKATHAN DOSAI RECIPE / MUDAKATHAN KEERAI DOSAI RECIPE / BALLOON VINE DOSA RECIPE

How to make mudakathan dosai, How to make baloon vine dosa, How to make mudakathan keerai dosai
Mudakkathan keerai (Balloon vine) is known for treating joint pains and cramps. This is also beneficial for arthritis, coughs and colds, menstrual cramps etc. These leaves can easily be grown in homes. ,Mudakku aruththan, in Tamil is pain reliever; pain in joints(mudakku, a type of arthritis) reliever(aruththaan) and hence the name. Recently when I went to Chettipunyam, I saw fresh leaves and bought this keerai in bunches. I made thogayal, chutney, powder and also made dosas. I also dried some leaves and powdered it. This powder can also be used while making dosas. This recipe is an easy method of making Mudakkathan dosai.
How to make mudakathan dosai, How to make baloon vine dosa, How to make mudakathan keerai dosai
INGREDIENTS:

Idli-Dosa Batter - 3 cups
Mudakathan keerai (Balloon Vine) - 2 fistfuls
Green chilies - 1 (optional)
Salt - a generous pinch (only for leaves)
Oil - to drizzle
How to make mudakathan dosai, How to make baloon vine dosa, How to make mudakathan keerai dosai
METHOD:

Wash mudakathan keerai well and take out the leaves. Discard the stems.

Grind the leaves alongwith little salt in a mixie to a smooth paste. (Green chillies can also be added. But I did not use). Add very little water if necessary. As the dosa batter has salt in it, add very little salt , only for leaves.

Add the ground paste to idli/dosa batter and mix well to get a dosa batter consistency.

Heat a dosa tawa, pour a ladle of batter in the centre and spread to a circle. Drizzle oil on sides. Once cooked, flip it to the other side and cook until crisp. Serve hot with sambar or molagapodi or any chutney of your choice.

NOTE: Do not preserve the batter in fridge after mixing the mudakkathan paste.

Tuesday, May 2, 2017

OATS ADAI

How to make oats adai

INGREDIENTS:

Tur dhal, Moong dhal, Gram dhal - 1/4 cup each
Oats - 1/2 cup
Thick poha - 1/2 cup
Green chillies - 2 or 3
Dry red chillies - 2 or 3
Chopped curry leaves - few
Salt - to taste

How to make  oats adai

METHOD:

Dry roast aval & oats until you get an aroma. Coarsely powder  in a mixie. Soak  dhals and chillies for 2 hours. Using very little water, grind dhals to a coarse consistency. Add powdered oats and aval, and grind again to a medium thick batter. Add water if necessary. Add chopped curry leaves and mix it well. 

Heat a tawa, pour a ladle of batter, spread the batter, drizzle oil on sides and cook until both sides are crisp and golden brown. Serve hot with avial, avakkai and dosai milagai podi.

Monday, April 10, 2017

CORN ON THE COB

How to make corn on cob?

How to make corn on cob?

‘Corn on the cob’ is a healthy evening snack and best snack during summer picnics. Easiest way is to boil the corn, while some people might grill or roast it. I prefer the boiling way, but I have mentioned the grill, roast and microwave methods too. 

INGREDIENTS:

Fresh corn - 2 or 3 ears
Unsalted butter- 2 tablespoons
Salt - to taste
Lemon juice - 1 tablespoon
Chilli flakes - 1 tablespoon
Black pepper powder - to taste
Dried / fresh herbs - to taste
Finely chopped cilantro – 2 tablespoons
Water - as required
A large pot


How to make corn on cob?

METHOD:

Select fresh corn with bright green husks. The kernels should be tight. Frozen corn can also be used.

NOTE: Boil corns when it is fresh. Keep the corn with its husk until you boil. Husk the corns just before you boil. For best results, cook corn in a large pot of boiling water until it is tender but not mushy. You can also cut the corn and boil. Frozen corn can also be used.

Boiling method:

Fill a wide, large vessel with water. The vessel should be big enough to hold the corn. Cover the vessel and bring the water to a boil. Drop the corns gently in boiling water and cook it covered until the water comes to a rolling boil again. The corns would have turned bright yellow by now. Remove the corns with tongs. Do not let the corn sit in the boiling water for long, as it will be overcooked. Corn on cob is usually tender and crunchy. If you prefer softer kernels and easy to chew corn, cook until soft.

Rub corn with lime and melted butter, sprinkle salt, black pepper powder, chilli flakes and finely chopped cilantro. (You can use any of your favorite spice mixtures , fresh herbs for toppings). Transfer to a serving platter, top with a small cube of butter and serve hot.

Microwave method:

Microwave high with husk for 3 to 4 minutes . Remove the husk and sprinkle with salt and spice mixtures.

Grilling/Roasting:

Roast over a medium-hot grill, turn with a tong on all sides until the outer husks are charred. When cool enough to handle, remove the husk and sprinkle with salt and spice mixtures.

Alternatively, keep the husks intact with the stems. peel the husks backwards, rub oil preferably olive oil, cover back the husks with a string or wrap with an aluminium foil and roast on a grill. When cool enough to handle, remove the husk and sprinkle with salt and spice mixtures.

Wednesday, February 22, 2017

RAVA ROAST / RAVA DOSAI / INSTANT RAVA DOSA / INSTANT RAVA ROAST

How to make rava roast, How to make rava dosai, How to make crispy rava dosa at home

Rava roast / Rava dosa is a popular South Indian breakfast. It is an easy to make instant dosa using sooji and needs no fermentation.

INGREDIENTS:

Rava/Sooji - 1 cup
Rice flour - 1 cup
Cumin seeds - 1/2 tsp.
Black pepper - 1/4 tsp. 
Ginger - 1" piece 
Green chilli - 1
Hing - a generous pinch
Curry leaves - few 
Coriander leaves - few 
Cashews - 4  
Salt - to taste 
Oil - 2 to 3 tablespoons
Ghee - 1 tsp.
Buttermilk slightly sour - 1 ladle (optional)

METHOD:

Mix oil and ghee. Keep aside.  Finely chop ginger, green chillies, curry leaves and coriander leaves. Crush black pepper slightly. Break cashews into small pieces.

Mix all ingredients in a ladle buttermilk(optional) and water without any lumps to a thin, watery batter. Set aside for 30 minutes. Add little more water if necessary.

How to make rava roast, How to make rava dosai, How to make crispy rava dosa at home

Heat a dosa pan and pour the batter with a ladle from the sides. You can also sprinkle the batter with your hands.

Drizzle ghee and oil mixture through the sides. Cook on medium flame and when it is golden brown in the bottom part, flip it to the other side and cook until crisp. Mix the batter well before making each dosa. 

Crispy rava roast is ready. Serve hot with sambar, milagaipodi or any chutney of your choice.

How to make rava roast, How to make rava dosai, How to make crispy rava dosa at home

NOTE: 
Buttermilk is optional. Water alone can be used.
The batter should be thin and watery. Thin and watery batter gives lacy dosas.
Mix the batter well before making each dosa. 
DO NOT cook in high flame. 
DO NOT spread the batter with ladle. 
Pouring the batter on the pan from 1 or 2 inches height gives lacy rava dosas.

VARIATION:

1/4 cup maida can be added to the above ingredients.

Onion rava dosa: If using onions, sprinkle finely chopped onions all over the tawa and pour the batter, alternatively onions can be sprinkled quickly after pouring the batter too. Finely chopped onions can be added to the batter as well.   

Thursday, July 28, 2016

MINI TIFFIN / MINI TIFFIN -1 / MINI TIFFIN COMBOS

How to make mini tiffin at home, Mini Tiffin, Mini tiffin combos

Mini-tiffin has become popular nowadays in restaurants. Typical south indian mini tiffin has idli, vadai, pongal, dosai and a sweet alongwith filter coffee. Being a foodie myself, I just wanted to make a different combo and made these at home. With a little effort, we can make mini-tiffin at home with different south-indian tiffin varieties. Who would not love to eat a mini-tiffin like this? Even I couldn't resist to taste these yummy delicacies. Needless to say, I relished it. This will make a perfect brunch. I did not make any sweets, but you can make it during special occasions and also when guests come home. I have given the recipe links below, click on them to know the method of preparation. Do try and surprise your family with these pleasures.

Neer Dosai with coconut and jaggery
Kanchipuram idly with molagapodi
Rasa vadai
Rava pongal with sambar - Rava pongal recipe will be posted later
Hot South Indian filter coffee

Enjoy mini-tiffin making at home. :)

Wednesday, June 1, 2016

SAMBAR VADAI / HOTEL STYLE SAMBAR VADAI / RESTAURANT STYLE SAMBHAR VADAI

HOW TO MAKE SAMBAR VADAI, SAMBAR VADAI, HOW TO MAKE HOTEL STYLE SAMBAR VADAI, HOW TO MAKE RESTAURANT STYLE SAMBHAR VADAI

I am a great fan of vadais. I would love and relish to eat sambar vadai anytime. Sambar vadai is my alltime favourite. Sambar vadai is vadai soaked in plenty of sambar yet with its crunchiness on top and not too soggy. Just follow the tips and Hotel sambar vadai will be ready at home. 

SAMBAR RESTAURANT STYLE (HOTEL SAMBAR):

INGREDIENTS:

Toor dhal - 1/4 cup
Tamarind - a lemon sized ball
Pearl onions - 1/4 cup
Tomato - 1
Salt - to taste
Turmeric powder - 1/2 tsp.
Sambar powder - 1 tablespoon
Mustard seeds - 1/4 tsp.
Hing
Oil
Curry leaves - few
Coriander leaves - few

To fry in oil and grind to a paste:
Coriander seeds - 2 tablespoons
Methi seeds - 1/8 tsp.
Pottukadalai (need not be fried) - 2 tsp.
Poppy seeds - 1/4 tsp.
Dry red chillies - 2
Pearl onions - 6 (raw)

Scraped coconut (optional)

METHOD:

Pressure cook toor dhal with turmeric powder, mash well and keep aside.

Soak tamarind in lukewarm water and extract juice.


Heat oil in a kadai and fry the items given in "To fry in oil and grind to a paste" (except pearl onions and scraped coconut) until golden brown. Grind to a thick paste alongwith 
raw pearl onions and scraped coconut (if using,I didn't use) using little water.

In the same kadai, heat oil, add mustard seeds, when they splutter, add curry leaves and pearl onions alongwith a pinch of salt and hing. Saute until translucent. Now add the chopped tomatoes, sambar powder, required amount of salt, and tamarind extract. Allow it to boil. Now, add the mashed toor dhal and ground paste. Let it boil until the raw smell is diffused and semi-thick. Transfer it to a bowl. Hotel sambhar is ready at home.

Take a cup of this sambar in a bowl. Add little water, a generous pinch of salt and mix well. Keep it ready to soak the fried vadas.

INGREDIENTS FOR VADAI:

Whole white urad dhal - 1/2 cup
Black pepper - 1/2 tsp.
Green chillies - 1 (finely chopped)
Ginger - 1/2" piece (finely chopped)
Coriander leaves - few (finely chopped)
Salt - to taste
Oil - to deep fry

METHOD:

Soak dhal in water for an hour.

Grind the soaked dhal in a grinder to a smooth paste using very little water. The batter when dropped in water should float and that is the consistency. When smooth and fluffy, take out the batter, add salt and other given items and mix well and fluff it with your hands. Do not add salt in the beginning. The batter doesn't double if added in the beginning. Add salt only when the batter is smooth.

Heat oil, wet your palms with water, take out a ball from the batter and flatten it using your hand and put a hole in the centre. (OR) can use a plastic cover (OR) banana leaf.

Carefully drop them into the oil and turn it on all sides and cook until golden brown.

Take the fried vadas from oil, and immediately soak it in the diluted sambar mixture and allow them to soak JUST UNTIL THE NEXT BATCH OF VADAS GET READY. DO NOT soak it for a long time.

PRESENTING SAMBAR VADAI (RESTAURANT STYLE):

INGREDIENTS:

Vadai - 8 (You will get approximately 8 vadas from the above measurement)
Hotel sambhar - As needed
Carrot grated - 1 tablespoon (optional)

Coriander leaves finely chopped - to garnish (I have added it in vadai batter)

FOR TEMPERING :
Mustard seeds - 1/4 tsp.
Ghee - 1 tsp.

METHOD:

Arrange diluted-sambar soaked vadais in a cup or plate, pour hot hotel restaurant style sambhar over the vadais. The sambhar should neither be too thick nor too watery. Add the tempering. Garnish with grated carrots and coriander leaves. Serve hot. 

Restaurant style sambar vadai is ready.
P.s. The picture above is without onions. Even without onion we get the texture.

Wednesday, April 13, 2016

KHANDVI

How to make Khandvi? Khandvi (Gujarati recipe)

Khandvi is an absolutely delicious, traditional savoury snack of Gujarat, made with gram flour and yoghurt and a perfect option for breakfast or evening snack. My daughter-in-law Shruthi, makes perfect, soft textured khandvi rolls. Making translucent and paper thin khandvi is truly an art, in which I should say she is an expert. Recently she made khandvi and sent this picture to me. The wonderful yellow colour caught my eyes and here is the recipe.

INGREDIENTS:

Gram flour (besan) - 1 cup
Fresh curd - 1 cup
Water - 1/2 cup
Ginger-green chilli paste - 1 tsp.
Turmeric powder - 1/4 tsp.
Hing - 1/4 tsp.
Salt - to taste
Lemon juice - 1/4 tsp.

To temper:
Oil - 3 tsp.
Mustard seeds - 1 tsp.
Finely chopped green chillies - 1/2 tsp.
Curry leaves - 1 sprig

To garnish:
Finely chopped coriander leaves - 2 tablespoons
Grated coconut - 2 tablespoons 

Gadgets:
A flat bottomed tray, spatula

METHOD:

Whisk curd and water. Combine besan with green chilli-ginger paste, turmeric powder, hing, salt and lemon juice. Add curd gradually and mix well without any lumps until smooth.

Grease the back side of the tray and the spatula with  1/2 a spoon of oil and keep it ready. 

Heat a pan, add the mixture and cook on a low flame for about 10 minutes. Stir continuously until it becomes thick and glossy. Switch off the stove. (NOTE: Once the batter is out of the stove, you have to spread the batter very fast while it is hot). Spread the mixture on the back of the greased tray while it is hot. Immediately level it with the spatula, as thinly as possible.

When cool, cut lengthwise into 1½-2" wide strips. Roll each strip gently to small cylinders. (You can either sprinkle grated coconut before rolling OR you can use grated coconut for garnishing)

Arrange the rolls in a serving tray, temper with the ingredients given in "to temper"and pour over the khandvi. Garnish with coriander leaves and coconut. Serve immediately with green chutney. 

Wednesday, March 23, 2016

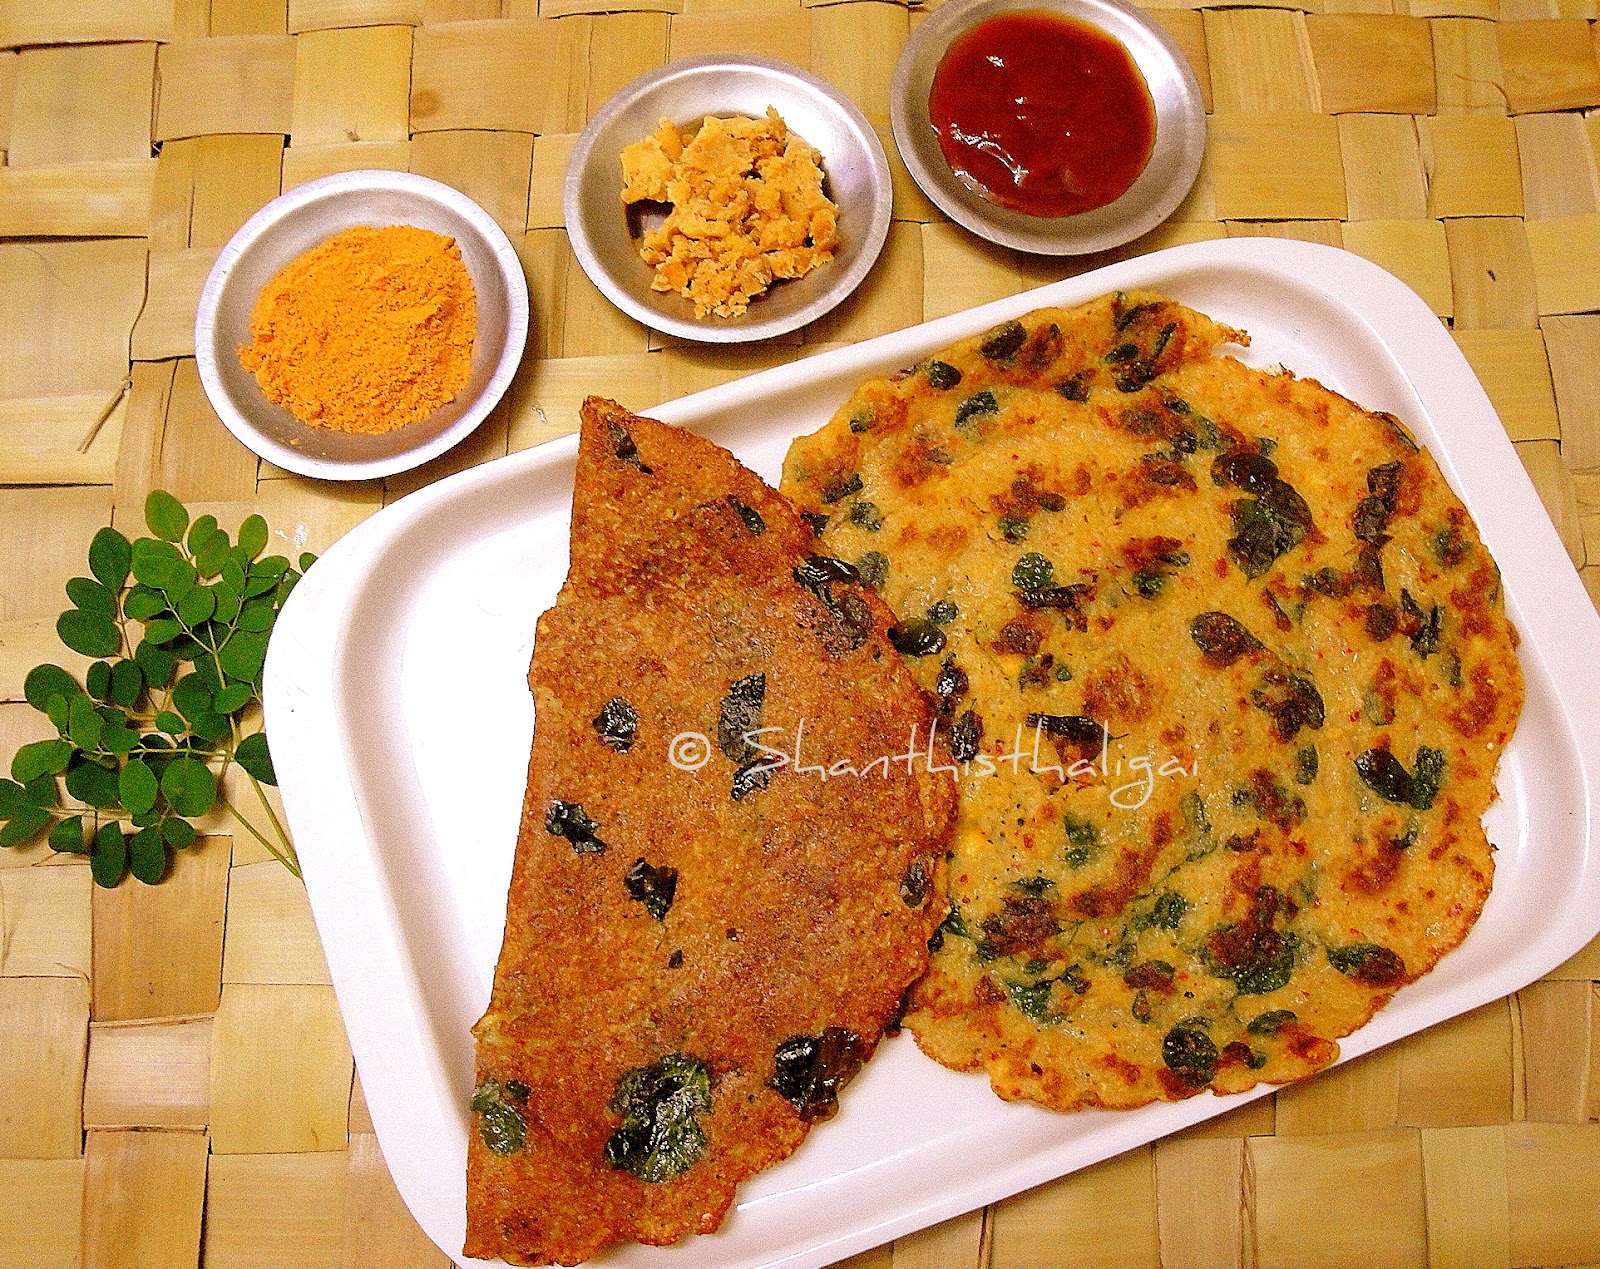
QUINOA DRUMSTICK LEAVES ADAI

Quinoa drumstick leaves adai.

Unlike regular adai, this quinoa adai is very light on stomach and easily digestible. Adding  drumstick leaves make this recipe highly nutritive.


INGREDIENTS:

Quinoa - 1 1/2 cup
Toor dhal - 1/2 cup
Gram dhal - 1/2 cup
Urad dhal - fistful
Drumstick leaves - 2 to 3 cups
Dry red chillies - 8 to 10
Curry leaves - 3 sprigs
Hing - a generous pinch
Salt - as per taste
Oil - to drizzle

METHOD:

Separate drumstick leaves from the stem, wash well, keep aside.

Soak quinoa separately. Soak dhals alongwith red chillies separately for 2 hours. Drain the water. Grind quinoa coarsely, add soaked dhals and grind further to a thick coarse paste, sprinkling little water alongwith curry leaves, hing. Add salt and drumstick leaves, mix well. The batter should be slightly thicker and coarse. 


In a pan, pour the batter and spread it from centre. Drizzle oil on sides. Cook until golden brown and crisp and flip to the other side. Goes well with butter and avial( Aviyal recipe is here). Serve hot with molagapodi, jaggery, tomato sauce or any chutney of your choice.